 World inside pictures Collect and share the best ideas that make our life easier
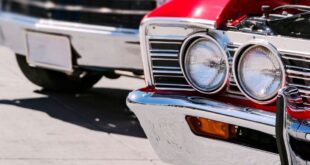
Headlights are integral part of your car and you cannot drive during night without them. Still there may be times when you may have to blackout the headlights. This trend started during the World War II but still it is use for making the car look different. While total blackout of the headlights may not be allowed in different places you can tint the headlights to get a different look.
You must remember that before doing something like blacking out the headlights of your car you must ensure that you have learned about the local rules. Once you find that they are permitted in the place you are working you can surely follow the instructions and blackout or tint the headlights. You can professional help for this or just give it a try yourself. It’s simple and easy if you get the right instructions and perfect tools.
Step 1: Preparation and Cleaning
In order to tint or blackout the headlight you have to remove any dust and dirt from the headlights first. If it is not done properly then the whole task will remain incomplete. Thus, you must make a proper solution and clean the headlights and the surrounding areas before you start tinting the headlight.
Step 2: Spray and Lubricate Lenses
You have to reposition the film while completing the total application, thus spray some amount of Rapid Tac on the lights. You must include the trims around the lights as well as the gaskets.
Step 3: Remove Liner
You must also mist your fingers for spraying Rapid Tac on the tint too.
Now, it’s time to remove the headlight tint from the liner.
As always, mist your fingers, and spray the Rapid Tac on the tint as well. Peel the liner slowly and carefully. For reposition the films on the light you must keep spraying on the both sides with the application fluid.
Step 4: Alight and Apply Tint
After you have sprayed with application fluid take the film and apply the adhesive side onto the lens. If you have application tabs you can use them now.
Step 5: Spray Tint
In order to reduce the scratching spray the outside of the film with Rapid Tac.
Step 6: Squeegee on Tints
You will require a squeegee for fitting the tints properly on the headlights. Take a squeegee and press down and keep squeezing the films with slow motions. You can find that water is removed from the films underneath.
In case after doing this you still find any large bubbles then it is best that you remove the film in that place and do the whole thing again. It is necessary that you do it while the film is wet, later you cannot pull it off.
Step 7: Heat the Tint
The film may get curled later on, thus take precautions now. Take a heat gun and heat the tint with it for curing and shrinking the film.
Step 8: Trim Away Excess
If there is excess vinyl attached thereto you must remove that excess from the edges. Else it will not look good and the finish will not be done.
Step 9: Allow to Cure & Pop Any Bubbles
Let the film dry out for about 30 minutes. After that carefully wipe out solutions that is in excess. If the solution is not removed totally then there may be some fogginess that is not good. However, as the film is porous this will evaporate after few days once sunlight reaches this place.
The curing process is important as during this the sunlight will make the film perfect and you can find the tint looking great on your headlights. In case you find bubbles after all this take a pin and pop it up. Be careful while doing so because too large pin is dangerous.
Step 10: Tint Complete
After the remaining bubbles are popped you are done with the whole project.