 World inside pictures Collect and share the best ideas that make our life easier
Laminate floors have become very popular nowadays. One of the reasons why people choose laminate, when choosing new flooring at their homes, is because it is so easy to install. You don’t even need to hire a laminate installer because you can do the entire job on your own. In this article we are sharing with you six helping steps to install laminate flooring on your own.
First, let’s list the needed materials you need to take before you start the laminate installation project:
- Flush-cut dovetail saw
- Utility knife
- Duct tape
- Spacer blocks
- Pry bar
- Glue
- Jigsaw
- Fine-tooth wood blade
Once you have the needed materials let’s start with the installation process. Here are the steps to take:
Step 1
First step to install the laminate flooring is trimming the door’s casings. Measure the height of the space between the floor and the door casing sing a piece of foam underlayment. In order to make a precise trimming and allow the laminate planks to slide underneath the door use a flush-cut dovetail saw.
Step 2
The next step in the process is installing the foam underlayment. First, vacuum the entire floor inside the room. Remove all the dirt from it and start unrolling the foam underlayment, covering the entire floor surface. To get precise foam angles that will fit the room angles use a knife. Don’t forget to but the seams together.
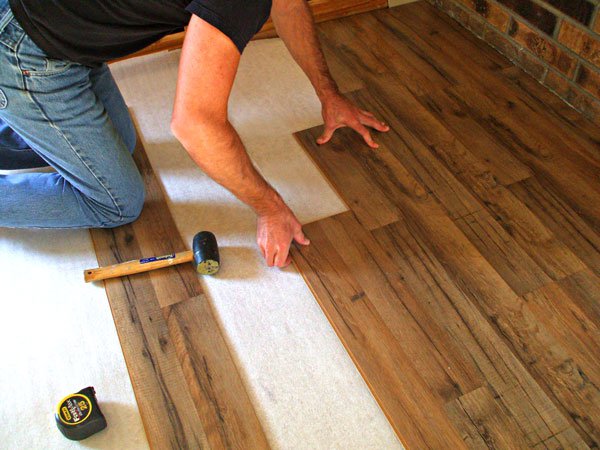
Step 3
It is time to star installing the laminate planks. Start with laying down the grooved end of the first plank in the corner against a spacer block. Place a spacer block along the wall so that the laminate planks can fill easily each other inside the first course. Take some measurements from the spacer block to the last installed laminate plank and then cut the planks on the marked places using cutting tool. Apply glue to the end groove of the plank and place the next piece of plank. Repeat the procedure with all the laminate planks. In order to bring the plans together tape them with a hammer.
Step 4
Now when you have installed all the planks, you have come to the most difficult step. In order to get precise laminate flooring take care of the doorway space. First, measure the width you have left for the last installed plank. Take in mind that you will need to notch the plank so that it can fit inside the doorway
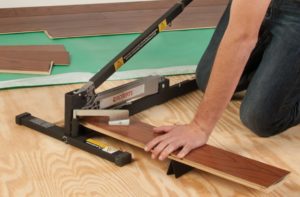
Step 5
Once you have measured the needed width, take the jigsaw and rip the plank. Use a fine-tooth wood blade to avoid damaging the plank and the door casing. Take in mind that you may need to cut the doorway notches for better fitting.
Step 6
You are almost done. Finally, remove the spacer block on the last wall, pulling it against the previous course. Use a pry bar in order to make the process of removing tightly and to avoid damaging the laminate. Allow the glue to stand for 12 hours and the remove the painter’s tape and the spacer. Your laminate floor is done.