 World inside pictures Collect and share the best ideas that make our life easier
Photo editing apps can help you edit your images like a professional. It is not a lot of work and you can become an ace editor in just a matter of a few weeks. However, buying licensed versions from the brand can burn a hole in your pocket. The best alternative then is to choose sites like ipiratebay from where you can download practically every good and credible photo editing app that exists in the market.
Whether you’re an Instagram enthusiast or a professional photographer, having a high individuality and consistency in your photos can make you an admired influencer in this category. To have beautiful, consistent photos populate in your Instagram feed or portfolio means that you have to leverage the power of a quality photo-editing tool such as lightroom presets.

Now, lightroom preset is one of the best photo editing tools any professional photographer should leverage. With this tool, you can easily unlock a wide array of settings and combinations, which when applied can transform the look and feel of your photos in just an instant.
But, while lightroom preset is a free tool that’s available online, there are other lightroom filters out there that offer a specific editing style to your photos. Lightroom presets come in a wide range of options to give your photos a unique and professional look at an instant. So, if you want to buylightroompresets for armature or professional use, then this post have detailed three of the best preset packs that you can consider.
But First, What are Lightroom Presets and How Do They Work?
If you’re looking to transform photography from a hobby to a business, you need to invest on smart editing tools such as lightroom presets. Now, what is lightroom presets? In simple words, lightroom presets are pre-configured settings that allow you to transform the looks of your photos into something more presentable and professional.
This tool can be downloaded from the internet to your device. Unlike normal filters, lightroom presets have a wide range of configuration options that let you add colors, filters, shadows, hues and contrast to your photos.
One of the notable benefits of this tool is how it allows you to edit a batch of photos at an instant to help you save time.
The best thing about lightroom preset is how fluid the interface is. To use this tool, you only need to select your photos then click any editing category you’d like to use. From there, you can hover through the different options to find which among them suits your taste. Once you’ve identified a suitable editing option, you just need to click on it to apply the changes to your photos.
3 Best Lightroom Presets
Choosing the perfect lightroom preset is quite challenging due to the wide range of options that are available. Since we all have our different tastes, choosing an editing tool means picking the right fit that will suit your specific style. With that in mind, this section will detail at least three lightroom presets that will suit any professional photographer.
Bali Lightroom Preset
If you’re a professional photographer, fashion blogger or graphic designer, then the Bali lightroom preset is something you can’t afford to miss out. Designed to give you a moody green theme, this preset is hugely preferred in photos that contain green vegetation.
This preset contains a dark and contrast curve setting that lets you enhance and upgrade your photos by adjusting the green color to make it sharp. Just like most lightroom presets, the Bali preset allows you to adjust your photos with just a single click.
How Does it Work?
- Step One: Start by launching the Bali preset. Next, select a photo, most preferably one with plants and green vegetation.
- Step Two: With the editing option visible on your right side, select the light corrections you’d like to add to your photo.
- Step Three: When you’re done, proceed to the color correction. Here, you’ll adjust the color temperature, tint, vibrance, and saturation.
- Step Four: Next, proceed to the effects editing where you’ll adjust the clarity effects such as texture, clarity, dehaze, and vignette.
- Step Five: Finalize your editing process by adjusting detail correction. At this point, you’ll adjust the sharpness, radius, detail, and masking curve settings.
- Step Six: Lastly, save your preset to create a customized Bali preset that can be used on other photos in the future.
Wedding Lightroom Preset
If you’re a wedding photographer, then you’re aware of how demanding this process can be. In this type of photography, you have to capture everything such as the love, emotion, and joy that the newlyweds are sharing. So, how do you polish wedding photos using lightroom presets?
- Step One: Get inside your photo gallery and import the wedding photos you wish to edit into a new location.
- Step Two: Next, cull the photos you wish to edit using flags or stars.
- Step Three: Once your wedding photos are ready for editing, the next step is to edit the images in stages. Here, you’ll start by perfecting the exposure, correct the colors, crop the image, apply white balance, sharpen the image, and reduce noise.
You can also use lightroom presets to brush off any minor imperfections to make the images appear neat and professional.
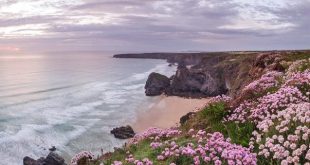
Sunset Lightroom Presets
The picturesque beauty of sunset is quite hard to capture regardless of whether you’re an armature or a professional photographer. That’s due to the bright sky and the dim foreground. In fact, this is the main reason why raw unedited photos of an amazing sunset appear flat, lifeless, and underwhelming.
Thankfully, there’s a simple way of combining two exposures in one image to make it more appealing. This is none other than using sunset lightroom presets. So, how do you use sunset lightroom preset
- Step One: When dealing with sunset lightroom presets, the first step of using this technique is to adjust your camera settings to avoid losing any details. This includes taking your photos in RAW format and in manual mode.
- Step Two: Once you’re done taking the photos, import them to lightroom to commence the editing process. Here, you can apply any of your customized presets or you can create a completely new preset to apply on your photos.
- Step Three: Once you’ve selected your favorite preset, the next step is to adjust the highlights. Here, you can use the slider on your right to adjust the exposure, highlights, shadows, and vibrance.
- Step Four: Next, use the graduated filter option to create an amazing sunset on your photo. Here, you need to activate the filter by pressing a point on your photo then dragging it down. Make sure you hold and drag a point on the sky section.
Next, click the mask overlay selection box to turn the selected part to red. With the sky appearing red, you can then adjust a couple of sliders such as the exposure, contrast, highlights, temperature, and tint.
- Step Five: Just before you’re done, it’s important that you use the range mask tool to brighten up any background images that might appear dark after using the graduated filter. To use this tool, simply click on Range Mask then select color. From there, use your cursor to select any background image that needs some color adjustment.
Conclusion
When it comes to editing photos, there’s no better way of doing it than using lightroom presets. With this editing tool, you can easily enhance the final looks of your photos to make them look stunning and professional. Other than that, lightroom preset is easy to use and it doesn’t take much of your time. So, if you’re looking to capture abundance of love and happiness on your photos, then lightroom preset is exactly what you need to invest on.