Looking for a personalized, customized gift for a loved one? Consider creating custom challenge coins. Click here to learn how to make a challenge coin easily!
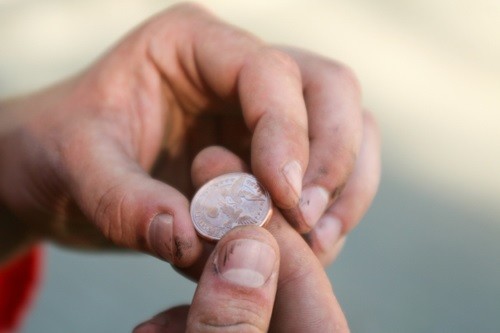
Do you want to give something memorable to a loved one for his service to the nation? Or do you want to honor your father with a special token on Father’s Day? A good way of doing so is by gifting them with a challenge coin.
The history of challenge coins goes a long way back. Today, presidents, sports teams, and individuals patronize challenge coins.
One of the biggest reasons for their popularity is their customizable nature. In fact, you can even create your own challenge coins. But do you know how to make a challenge coin, to begin with?
Continue reading below as we teach you how to make customized coins in seven steps.
- Start with a Concept
If you want to create a challenge coin, you need to start with a concept. Keep in mind that this particular step is subjective. This means there are factors that you may consider that other people may not.
Nevertheless, there are key factors that will serve as foundations in your customized coin. First, you want your coin to be as inexpensive as possible. Sure, you don’t want to scrimp on quality, but you can still strike a balance between your budget and the outcome.
Next, you want it to be durable. It doesn’t have to be ultra-sturdy as the ones offered by professional coin makers. What you want is something reasonably durable.
You also want a coin that is easy to produce. This also means it is easy to reproduce. Additionally, you want the coin to be scalable.
This means you will not have a hard time making 10 or 100 pieces. Last but not least, you want to produce a coin without the need for any special equipment. These are equipment that is too expensive.
- Prep the Materials
Learning how to make a challenge coin also involves using the right materials. Since you want your coins to be inexpensive, you will use some items that will not break the bank.
You will need some ceramic clay or metal clay; linoleum carving tools; and some 2×3-inch linoleum blocks that you can carve.
Furthermore, prepare some cookie cutters; mineral or vegetable oil; and a sturdy rolling pin. Making a coin also requires some clay flower pots or burning pit; some charcoal, wood shavings, and sawdust; and sealants like floor wax, polyurethane, or tung oil.
You may also add some paint if you want to add color to your coins.
- Work on Your Design
How exactly do you design a challenge coin? There are three aspects that you need to work on: the actual design, the size, and the thickness of the coin.
Since you are going to work with clay and linoleum blocks, expect some limitations when it comes to your design’s complexity. However, this will still do wonders for your coin in the end. Because there is little room for intricate designs, you can focus on a single message or element that you wish to convey.
You can make a particular element stand out from the rest. You can make it bolder than the other elements, making it the first thing the receiver will notice.
Since you are working on clay, you can mold it to any size that you want. Keep in mind that the size of the coin affects the latter’s chances of breakage.
Try to keep the coin under two inches or 51 millimeters in diameter. Working on a smaller coin reduces the chances of breaking.
When it comes to the thickness, thicker adds more substance to the coin.
- Do Some Carving
After finalizing your design, you can proceed to carve your stamp. Keep the image as simple as you can. But make it bold at the same time.
If drawing an image is not your strength, consider using free clipart online. If you plan to add some lettering, make sure to have it in reverse in the printing software. Print your design in any size that you like.
Thereafter, transfer your printed design to the linoleum. For starters, you can use a carbon paper and trace the image between the linoleum block and the design. Don’t forget to reverse the lettering so it comes out readable.
Now you can start carving the linoleum. You may need to use a drill bit if the design comes with small rounded holes.
- Start Making Them
This phase is where you make the final preparations before putting your coin into the fire. Prepare your clay by rolling it out into a slab. Using a cutter, cut rounds from the slab depending on the size of your coin.
Prepare your linoleum blocks by brushing some oil on the surface. One round of application is enough to make up to five coins. Thereafter, get a round of clay and place it over the block where the complex designs are.
Roll the clay into the linoleum stamp using your rolling pin. After attaining the right impression, place the other half of the block on top and press accordingly. Afterward, separate the two blocks and trim the excess clay from the coin with your cutter.
- Fire ‘Em Up
Before you cook the coins, dry them for a few hours using a dehydrator. Create a pit fire by using a fireproof metal bucket. Fill the bottom with wood shavings or sawdust.
Place the clay coins over the shavings. Bury the clay coins with more sawdust or wood shavings. Cap off the pit by placing some wood and charcoal on top.
Cover the pit with a metal cookie sheet.
Fire it up and let the coins burn and cool overnight. Carefully take out the coins the following day. Use a stiff brush to clean the coins.
- Decorate
Last but not least, start decorating the coins. Pick the colors that you want and color within the lines of the design. Finish your masterpiece by covering the lines with a black sharpie marker.
Some people don’t like altering their coins but there are other ways to decorate. You can get a nice display case. Add beautiful labels or a unique glass design to cap it off!
You should also consider getting banners to hang around your display case and challenge coins. These give people a general idea about their meaning before they even approach for a closer look.
Now You Know How to Make a Challenge Coin!
Learning how to make a challenge coin is fun and challenging (pun intended). But once you get the hang of it, you can give out precious tokens that show your appreciation to people you love.
But if making customized coins is too tedious for you, there are other personalized gift ideas to try. Check out our other blog posts for more options you can DIY at home.
 World inside pictures Collect and share the best ideas that make our life easier
