 World inside pictures Collect and share the best ideas that make our life easier
Now that spring is in full swing, it’s time to break out the gardening gloves, fresh soil, and hand-picked pots and dive into transplant season. Unfortunately, the winter months can be harsh on delicate house plants, leaving them needing a little TLC once the cold subsides.
Luckily, you don’t have to have a super green thumb to repot your plants. Though the process varies slightly by species, most transplant and propagation projects are relatively simple. Follow these tips and tricks to transition your plants without damaging your leafy friends.
Remove the plant from its current pot
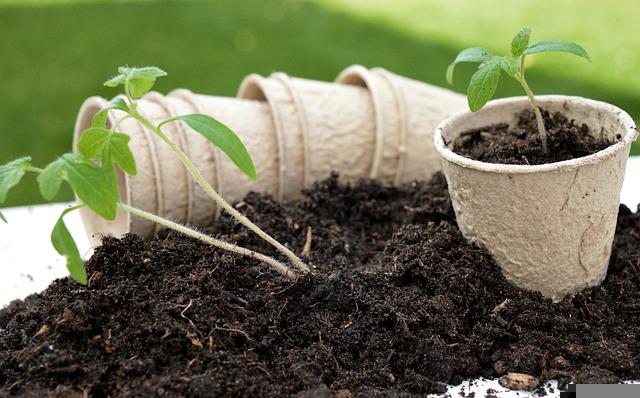
Most times, a new home can solve even the toughest plant problems. Whether your houseplant is fast-growing and rootbound or wilting and shedding, transferring roots to a more hospitable environment can encourage growth and sprouting. Though clay and plastic vessels are popular choices, consider researching fabric pots for plants to combat rootbound systems with a more flexible option.
Begin by carefully removing the plant from its pot by turning it sideways, holding it near the stem, and patting the bottom until your root system slides out. Though it may take a few taps to loosen plants with tangled, overflowing roots, remain patient and gentle to avoid traumatizing your potted pal.
Loosen roots
Loosen the roots from the old potting soil using your hands, taking note of any dryness, rotting, or breakage. Once you’ve dusted off most of the dirt, begin to prune stringy or dead stems to promote growth and reduce transplant shock.
Remove old potting mix
You will want to remove approximately one-third of the potting mix from around the plant to make room for fresh soil, fertilizer, and drainage ingredients. As the plant grows, it will absorb the nutrients in the mix, promoting healthier root systems and leaf growth.
Add new potting mix
Using fresh soil, pour a layer into your new plant, removing any air pockets by packing the dirt down. If the planter lacks a drainage hole, layer the bottom with gravel or lava rocks to encourage drainage. That way, you can avoid root rot and overwatering, reducing the need for frequent transplants.
Add plant
Take the plant you removed from the grow pot and place it in the new planter on top of your fresh mix layer. Ensure that the plant is centered, then add enough planting compound to surround it, ensuring it’s secure.
Refrain from adding and packing too much soil into the planter, or you will prevent the roots from breathing. You can stir in a few scoops of perlite to keep soil breathable for sensitive systems.
Water and enjoy
Finally, level the potting soil out, water the plant thoroughly, and watch as your plant recenters itself in its new home. Though it may take a few days to adjust, plants are resilient and will pop back in no time.
Signs it’s time to repot
- Out of control roots growing through drainage holes
- Roots peaking out of topsoil
- Slow growth (outside winter dormancy)
- Top-heavy plants
- The plant dries out too quickly
- Pronounced mineral and salt build up on the planter or plant itself
Before you go
Though transplanting your potted pals may be anxiety-inducing, repotting your plants may save them from an early demise. Once you understand the basics of rehoming your greenery, you’ll find the process speeds along. By using the proper pot, handling roots with care, and allowing the plant time to adjust, your plants will survive any repot your throw its way.