 World inside pictures Collect and share the best ideas that make our life easier
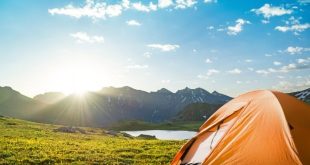
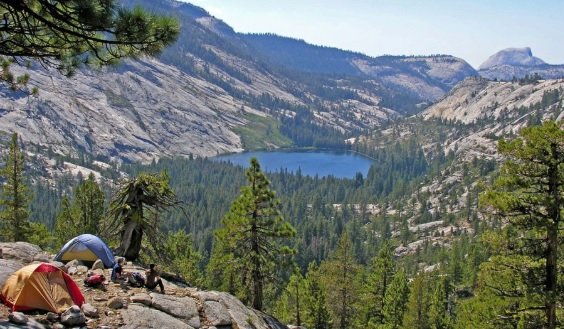
Beyond the busy and bustling local trail of the campsites is a more immersive experience. Backpacker offers a richer, more rewarding appreciation of the natural world. Carrying life essentials on your back will be both liberating and physically demanding.

If you are ready to take a chance with a backpack, follow these steps:
- Find an experienced partner
- Choose a route to start easy
- Get prepared
First Step: Find an Experienced Partner
If you have a friend or two who are backpackers, ask them to take you on a one or two night excursion trip. Most likely, they will be happy to share their experience with you, can recommend or lend you the gear, and you may be able to bring your own team to share.
If you don’t know a backpacker, find a friend willing to give a backpack class with you. It’s smart, and often more fun, to take at least one other person with you on your first excursion trip. If you just like a solo backpacking experience, follow our solo hiking tips.
Second Step: Choose A Route with a Backpack
Where to go with a backpack will depend on several factors:
How much time do you have? You can only have a weekend, but that’s enough for your first outing.
Your fitness level: Evaluate how you are and how much time you have to train before departure.
Distance: Decide the number of miles and hours to be comfortable hiking in a day, especially when carrying a heavier backpack than normal. If you are a beginner, a comfortable travel distance is in the range of three to eight miles round trip (if you are not fit, or if you are traveling with children, you probably want to get on shorter routes).
Elevation: How much elevation can be handled? If you are already a hiker, you probably have a good idea of the elevation on the routes with which you feel comfortable. We must bear in mind that you carry more weight than you are used to wasting your time. If you have little experience managing elevation gains, you probably want to adhere to a relatively flat route, for starters.
Time of the year and weather: If the afternoon falls early, as in autumn, plan a route or leave enough time to avoid hiking in the dark. Always check the weather forecast and cancel your trip if a storm is moving.
Logistics: Decide if you are going to walk a circular path, exit and return on the same stretch of path or make a point-to-point route. If you are from point to point hiking, you will need transport vehicles to the start and end points. You will also want to consider the driving time at the beginning of the trail and make sure that you give yourself enough time for the camp before nightfall.
Step Three: Choose a Backpacking Team
Make sure that you and your fellow backpackers are on the same wavelength when it comes to what you are wearing. Check before leaving home. It can be a real disappointment to discover that nobody brought a lighter from the stove or a water filter.
One of the main advantages of going with a backpack with an experienced partner or partners is that they are likely to have the communal equipment you will need, such as tent for two or three people, stove and kitchen utensils.
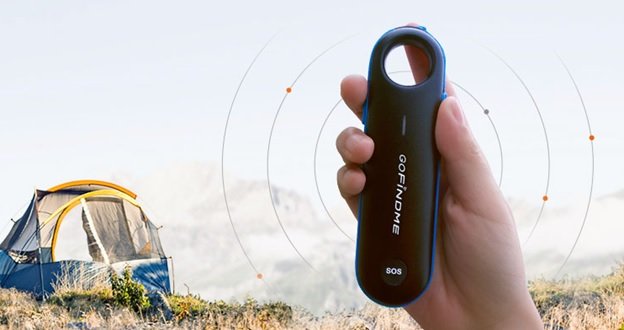
If you go with a larger group, it is advisable to carry personal GPS tracking devices so that everyone can share real-time location via phone app, even when there’s no cellular service.
In addition, your experienced friends can advise you on what not to bring, in order to limit the weight in the backpack.
Here are some more details about the group backpacker team you need:
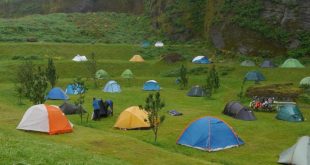
Tent: They are much lighter in weight than tents that are transported in camping cars. That is because they are more compact and tend to be made of superlight materials (which can increase the cost of the tent). Consider the size: a three-person tent weighs less (and is cheaper) than three single-person tents. If your group is creating a base camp for a couple of days, a large tent with more head height may be worth the extra weight.
Stove: A compact stove that boils water quickly, such as an integrated vessel system, can be ideal for group dinners. All you need to do is add the boiling water to lyophilized dishes and let it sit for about 10 minutes. If your group is larger than three, consider two stoves. This way no one will be hungry waiting for the pot to start to boil.
Water treatment: Some people carry all the water they think they will need a couple of days, which can be very heavy. By filtering or treating water from creeks and lakes, weight will be saved. Make sure that you and your hiking partner have a water filter that can be used (bring more than one filter for a group). Depending on the filter style you are using, you probably also have to bring your own water bottles and / or a hydration reservoir with the drinking tube.
Kitchen supplies: If you are using an integrated stove system, the cooking pot is built in. Otherwise, you will have at least one portable kettle or in a pot in which to boil the water. Each person will also need a cup and bowl and a spoon or a spork. You can create a kitchen kit that contains some basic concepts: a long-handled spoon for stirring; a small spatula if you are going to fry; a kitchen knife; Salt and pepper and other spices in small bags or bottles. Consider a collapsible camp basin, too, and a small sponge and bottle of biodegradable soap to wash dishes well away from camps and water fountains.
With the tips above, sure you know how to plan your first backpacking and hiking.