 World inside pictures Collect and share the best ideas that make our life easier
Do you love gold leaf sheets as much as I do?
Why wouldn’t you?
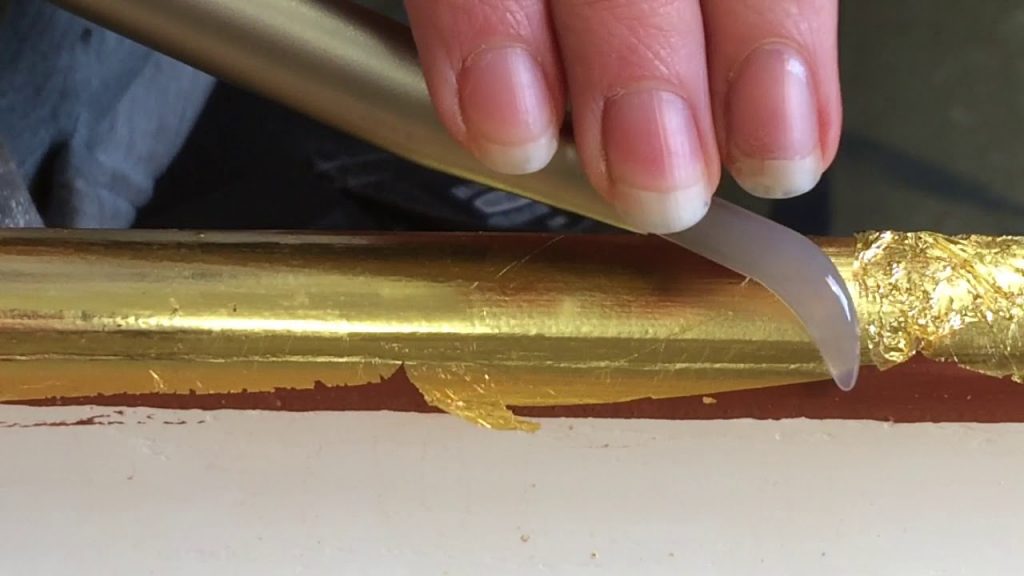
Gold leaf foil adds a sophisticated touch to everything, whether it’s furniture, luxury corporate gifts, hand-made gifts, chocolates, etc. Unlike aluminium foil, gold leaf sheets are so fragile and lightweight that they can fly away with a slight breeze, making them a little difficult to handle, especially when working with small pieces of sheets.
Gold leaf also adds an elegant touch to about all the lettering projects, whether they are on paper, wood, glass or even canvas. It gives a simple piece an extra dimension. There is definitely something special about typography pressed onto material with gold foil.
However, unfortunately, gold foil printing isn’t that simple. It isn’t a do-it-yourself activity; it involves die cuts, big machines, and various other things to stamp foil onto the paper.
The good news is, I have a few DIY methods that are super easy and real quick. The only trick to nice lettering with gold leaf is in the sizing, adhesive to hold the gold leaf pieces in place, and stamps to ensure a neat job.
Basics – All That You Need To Know
Before creating gold leaf products using gilded letters, make sure you are familiar with the process of gilding so that no gold is wasted. A special adhesive called sizing, glues gold foil to the project. It is important to apply the gold leaf adhesive only where gold is desired; otherwise, your entire project can turn out messy. The gold leaf sheet is so light in weight that a slight charge on the soft, gilded brush picks them up. To create a static charge on the brush, rub it on your clothing, and then hold the bristles close to the foil.
You must also know when to smooth the sizing. Use the gilding brush or cotton ball to smooth the surface when the sizing is tacky but not too dry.
You don’t need a large gold sheet to cover large letters; small pieces of gold leaf can create the same gilded look.
Stamped Statements
Crafts stamps with individual letters, phrases or words can create beautiful, gilded works without requiring calligraphy skills.
- To ensure a moderate coating of glue on the craft stamp, apply sizing, rather than ink using a paintbrush.
- Then stamp the project piece exactly where you want the gold lettering.
- Allow the sizing to dry until it’s slightly tacky.
- Apply gold leaf flakes or foil over the stamped area and burnish with gilding brush to create stamped statements.
Freehand Fonts
If you want to create large, cursive letters, or create freehand gilded letters, use an artist brush to work with the sizing. Make sure you check the project piece after painting each letter so that the gold sticks easily.
If you are using soft surfaces such as pasteboard, print out and cut out the desired letters first, so that you can easily trace around the letters directly onto the project piece using a craft knife. This indentation creates a guideline you must follow when painting the sizing onto the project piece.
Stencilled Simplicity
You can use stencils to craft even complex, intricate lettering without making any mistakes. To fully ensure that the plastic stencil stays in place, stick it onto the project using a repositionable spray adhesive. Apply sizing to the letters in the stencil, and you are good to go.
Craft your own stencil from contact paper.
- You can do this by drawing the letters onto the backing paper in reverse. Or by merely printing and cutting words or phrases out of the paper, and then tracing them onto the backing paper.
- Then cut the letter shapes from the backing paper using a craft knife. Make sure that you don’t slice through the sides of the contact paper.
- Finally, smooth the sticky backing paper on the project; apply sizing and eventually gold foil through the cutout area.